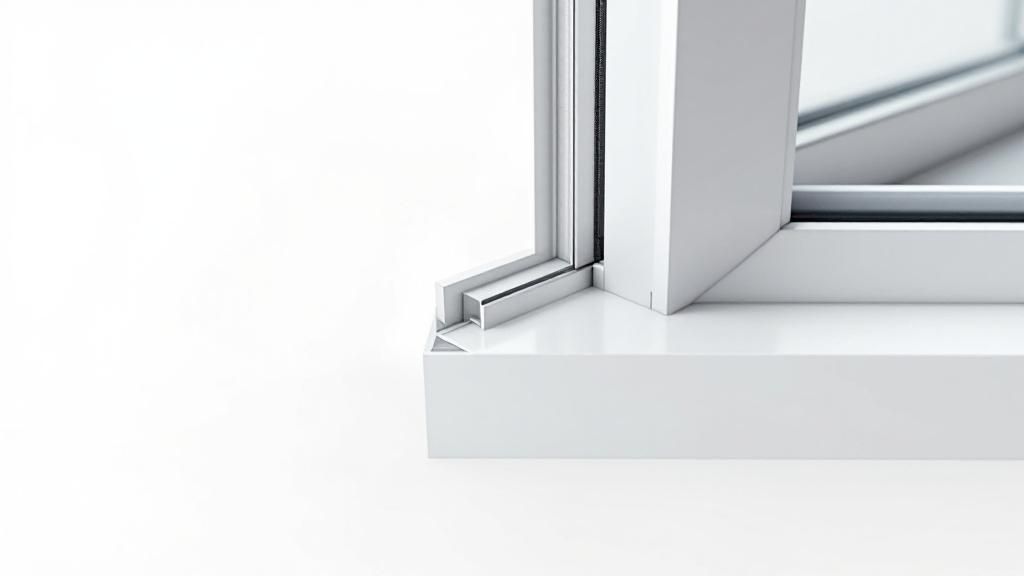
In the Bay Area, where architectural standards are high and microclimates can be demanding, windows are more than just openings. They are critical components of a building's performance, safety, and aesthetic. For builders, contractors, architects, and discerning homeowners in Berkeley, Oakland, and across the region, overlooking a thorough window inspection can lead to costly water damage, poor energy efficiency, and even code compliance issues.
A regular, detailed inspection is the best defense against the Bay Area's unique challenges, from salty marine air to seismic considerations. This comprehensive window inspection checklist provides a professional framework for evaluating every critical aspect of a window system. Understanding the underlying principles, such as those highlighted in resources discussing the power of checklists, reinforces why this proactive approach is so crucial.
Think of this guide not as a chore, but as a strategic asset. According to Energy Star, sealing air leaks around windows can save an average of 10-20% on heating and cooling bills. By following these essential checkpoints, you’re not just maintaining a property; you're preserving its value and ensuring it meets the high standards expected in our local communities.
Structural Integrity of the Window Frame
The window frame is the foundational element that supports the entire window assembly. A thorough structural integrity assessment is the first and most critical step in any comprehensive window inspection checklist. This evaluation confirms the frame is sound, stable, and capable of providing the necessary support for years to come.
A compromised frame can lead to a cascade of problems, including operational failures, water intrusion, and energy loss. A structurally sound frame ensures the window operates smoothly and seals effectively against the elements. Issues like warping or rot can break the airtight seal, drastically reducing energy efficiency and allowing moisture to penetrate the wall cavity. For professionals in the Bay Area, where homes often face a mix of sun, wind, and damp conditions, verifying frame integrity is key to a lasting installation or repair.
How to Check the Frame
- Check for Square and Level: Use a carpenter's square at each corner and a level on the sill and jambs. A frame that is out of square can cause the sash to bind, making it difficult to open and close.
- Probe for Rot: For wooden frames, use an awl to gently probe areas susceptible to moisture, such as the sill and lower corners. If the tool sinks in easily, it indicates rotted wood that needs repair or replacement. You can find more detailed information on maintaining wood frames in this extensive guide to wood windows.
- Inspect for Gaps: Carefully examine where the window frame meets the wall. Any visible gaps can be a significant source of air leaks and water entry.
Condition of Window Glass and Glazing
The glass and glazing are critical for visibility, insulation, and safety. A detailed evaluation of the glass panes and seals is a non-negotiable part of any professional window inspection checklist. This step identifies issues like cracks, chips, and failed seals that compromise both performance and aesthetics.

The integrity of the window glass and its glazing seal is fundamental to its insulating properties. A broken or failed seal in a double or triple-pane window allows the inert gas to escape, creating a thermal bridge that lets heat pass through easily. This results in higher energy bills and reduced indoor comfort, a common concern in varied Bay Area climates from San Francisco to Oakland.
How to Check the Glass
- Inspect in Varied Lighting: Examine the glass under different lighting conditions. Direct sunlight can reveal fine scratches and haziness, while angled light can highlight chips.
- Check for Seal Failure: Look for condensation or a foggy, milky appearance between the glass panes of insulated glass units (IGUs). This is a definitive sign the hermetic seal has failed and the window's insulating value is compromised.
- Feel for Temperature Differences: On a cool day, carefully run your hand over the interior surface of the glass. A noticeably colder spot can indicate a seal failure, even if condensation isn't yet visible.
Function of Window Hardware and Mechanisms
The intricate system of hardware and mechanisms dictates a window's daily performance and security. This part of the inspection involves a comprehensive evaluation of all moving parts, including locks, handles, hinges, and cranks. It ensures the window operates smoothly, locks securely, and is safe for all users.

Functional hardware is essential for ventilation, egress, and security. A window that won’t open properly can be a fire safety hazard, while one that won’t lock is an open invitation for intruders. In the Bay Area, where salt air can accelerate corrosion, inspecting and maintaining metal components is vital for extending the lifespan of premium window systems.
How to Check the Hardware
- Test Full Range of Motion: Operate each window through its complete opening and closing cycle. Casement and awning windows should crank smoothly without clicking or excessive resistance.
- Inspect and Tighten Fasteners: Check all visible screws on handles, locks, and hinges. Loose fasteners can cause misalignment and operational failure over time.
- Lubricate Moving Parts: Apply a silicone-based lubricant appropriate for the hardware material to all moving components to reduce wear and protect against corrosion.
- Verify Locking Mechanisms: Test every lock to ensure it engages fully and securely. The sash should be tight against the weatherstripping when locked, with no rattling.
Performance of Weather Stripping and Seals
A window's performance heavily relies on its seals. Assessing the weather stripping and sealing performance is a crucial part of any window inspection checklist, focusing on the materials that prevent air and water infiltration. These small components are essential for maintaining energy efficiency and protecting the structure from moisture damage.

Worn, cracked, or compressed weather stripping creates gaps that lead to drafts, heat loss in winter, and heat gain in summer. Compromised seals can increase energy bills by forcing HVAC systems to work harder. Furthermore, water intrusion from failed seals can lead to mold growth and rot within the wall cavity, as highlighted by the importance of airtightness in building envelopes.
How to Check Seals
- Use a Smoke Pencil or Incense: To precisely locate air leaks, safely move a smoke pencil around the window perimeter. The smoke will be drawn inward where there are gaps in the seal.
- Check for Material Degradation: Visually and physically inspect the weather stripping for signs of brittleness, cracking, or compression. If the material does not spring back when pressed, it has lost its effectiveness.
- Choose Appropriate Materials: When replacing seals, select materials suited for the local climate. Silicone and EPDM are excellent choices for the Bay Area's varied weather, offering durability against both sun and moisture. You can explore the right time for these upgrades with this guide on why spring is perfect for window and door upgrades.
Condition of Window Screens
Window screens are a crucial component of a functional window system, providing ventilation and protection from insects. A comprehensive check of their condition and functionality is an essential part of any window inspection checklist. This step ensures screens are intact, secure, and operating as intended.
Damaged screens with torn mesh or bent frames compromise their primary function, allowing pests to enter and diminishing the building's aesthetic. For property managers in areas like Berkeley and Oakland, well-maintained screens contribute to a property’s value and tenant satisfaction. Ignoring screen damage can lead to pest problems and may signal neglect during a pre-purchase home inspection.
How to Check the Screens
- Clean and Inspect: Before inspection, clean screens with mild soap and water. This makes it easier to spot small holes, tears, or fraying in the mesh.
- Check Frame and Hardware: Examine the screen frame for bends, cracks, or corrosion. Test the tension springs, pull tabs, and other mounting hardware to ensure they are secure.
- Verify Proper Fit: The screen should fit snugly within the window frame with no significant gaps along the edges. A poor fit can allow insects to bypass the screen entirely.
Evaluation of the Window Sill and Drainage System
The window sill and its integrated drainage system are the primary defense against water infiltration. A comprehensive evaluation of these components is a vital part of any window inspection checklist. This assessment confirms the system is clear, functional, and correctly sloped to prevent moisture damage.
A blocked or improperly designed drainage system can lead to water pooling on the sill and seeping into the wall cavity, causing rot and mold. This evaluation is especially critical for coastal properties in the Bay Area that endure frequent wind-driven rain. A functional sill and drainage system protect the integrity of the building envelope, preventing long-term, costly repairs to framing and insulation.
How to Check Sills and Drainage
- Verify Proper Sill Pitch: Use a level to confirm the window sill has a slight downward slope away from the window. This positive pitch is essential for gravity to pull water away.
- Clear Weep Holes: Inspect all weep holes on the exterior bottom of the window frame. Use a soft pipe cleaner or compressed air to remove any dirt, insects, or debris.
- Conduct a Water Test: With a spray bottle, apply a controlled amount of water to the exterior glass and frame. Observe the sill and weep holes to ensure water flows freely out, not back toward the interior.
- Inspect for Stains or Damage: Look for water stains, peeling paint, or signs of rot on and below the sill. These are clear indicators of past or present drainage failures.
Compliance with Safety and Egress Codes
A window's role in occupant safety is paramount. A safety compliance review ensures that windows meet all relevant building codes, including specific emergency egress and accessibility standards. This step is a non-negotiable part of any professional window inspection checklist.
This evaluation is critical in residential settings, where bedroom windows must offer a viable escape route in a fire. According to the California Building Code, egress windows in sleeping rooms must have a minimum net clear opening of 5.7 square feet. In the Bay Area, where codes are rigorously enforced, confirming compliance is a core professional responsibility.
How to Check for Safety Compliance
- Verify Egress Dimensions: Use a tape measure to check that windows in sleeping areas meet local code for minimum clear opening height, width, and overall area.
- Check Sill Height: Measure the distance from the finished floor to the window sill. Egress window sills cannot be more than 44 inches above the floor, ensuring an average person can climb out during an emergency.
- Consult Local Codes: When in doubt about a specific code interpretation, always consult the current California Building Code or local Berkeley and Oakland building officials for clarification.
Assessment of Energy Performance and Insulation
A window is a critical component of a building's thermal envelope. Evaluating its energy performance is a key part of any modern window inspection checklist. This assessment measures how well a window prevents heat transfer, stops air leaks, and contributes to overall energy efficiency.
Inefficient windows can account for 25%–30% of residential heating and cooling energy use, according to the U.S. Department of Energy. For contractors and homeowners in the Bay Area, where energy codes like Title 24 are strict and utility costs are high, this assessment is essential. Improving window performance adds significant value and helps meet sustainability goals.
How to Check Energy Performance
- Use a Thermal Imaging Camera: This is the most effective tool for visualizing energy loss. Scan the window to pinpoint specific areas of heat loss or cold air infiltration.
- Check NFRC and ENERGY STAR Labels: If available, locate the National Fenestration Rating Council (NFRC) label on the window. This label provides verified data on U-factor and Solar Heat Gain Coefficient (SHGC).
- Conduct an Air Leakage Test: On a windy day, carefully move a smoke pen around the perimeter of the window sash. If the smoke is drawn inward, it indicates a significant air leak. If your inspection reveals poor performance, you can learn more about energy-efficient windows for Bay Area homes to find modern replacement options.
Frequently Asked Questions (FAQs)
1. How often should I perform a window inspection?
For most residential properties in the Bay Area, a thorough window inspection once a year is recommended. For commercial properties or homes in harsh coastal environments, a semi-annual inspection in the spring and fall is a wise practice to stay ahead of seasonal wear.
2. What are the most common signs that my windows need replacing?
Key signs include condensation between glass panes (seal failure), difficulty opening or closing the window, visible rot or corrosion on the frame, and a noticeable increase in outside noise or drafts. According to the California Energy Commission, upgrading to energy-efficient windows is one of the most effective ways to improve home comfort and reduce energy bills.
3. Can I just replace the glass instead of the whole window?
In many cases, yes. If the frame is still structurally sound and free of rot or damage, replacing the insulated glass unit (IGU) is a cost-effective solution, especially for failed seals. However, if the frame itself is compromised, a full replacement is necessary.
4. What are the best window materials for the Bay Area climate?
Materials like fiberglass and high-quality wood or clad-wood windows perform exceptionally well in the Bay Area's diverse microclimates. Fiberglass offers excellent durability against moisture and sun, while modern wood windows from suppliers of "Berkeley building materials" provide natural insulation and timeless aesthetics.
5. What is the difference between U-factor and SHGC on a window label?
U-factor measures how well a window prevents heat from escaping, with lower numbers indicating better insulation. Solar Heat Gain Coefficient (SHGC) measures how much solar heat the window blocks, with lower numbers being ideal for warmer climates to reduce cooling costs. Both are critical for compliance with California's Title 24 energy code.
From Checklist to Action: Partner with Bay Area's Window Experts
Navigating a comprehensive window inspection checklist is a commitment to quality, safety, and performance. This guide has armed you with the critical knowledge to evaluate every facet of a window assembly. Whether you're an architect specifying products for a new custom home in the Oakland hills, a contractor verifying an installation in Berkeley, or a homeowner assessing your property's readiness for the next rainy season, this checklist provides a clear, actionable framework.
By systematically applying these checkpoints, you can confidently identify subtle signs of wear like compressed weather stripping, diagnose poor drainage in a window sill, and verify compliance with critical safety and energy codes paramount in California. An inspection that uncovers fogging between glass panes is an opportunity to upgrade to high-performance units that align with the Bay Area's energy-conscious ethos. Identifying a warped frame is a chance to select a superior material like fiberglass or premium wood from a trusted "lumberyard near Oakland" that can withstand local climate challenges.
When your window inspection checklist reveals the need for replacement parts or a full upgrade, turn to the experts who understand the unique demands of Bay Area construction. The knowledgeable team at Truitt and White can help you translate your findings into effective solutions. Visit our Berkeley showroom for expert advice and explore our extensive selection to ensure your project's success.


