A DIY entryway storage bench is a perfect project to bring order and seating into your home. When you build it yourself, you create a custom piece that perfectly fits your space. It's a satisfying build that solves storage needs for shoes, bags, and keys.
Why a Custom Bench Transforms Bay Area Entryways
Your entryway sets the first impression for your home. In many Bay Area houses—from historic Berkeley bungalows to compact San Francisco condos—space is a luxury. A generic, store-bought bench often doesn't fit well or offer the right storage.
This is where a DIY project really shines. Building your own bench means you control every dimension, ensuring no inch of valuable space is wasted.
Solve Real Organization Challenges with a DIY Bench
A custom bench is more than a place to sit; it creates a home for daily clutter. Instead of a jumble of shoes by the door, you can design intentional solutions. A well-designed bench brings calm to a busy household.
- Open Cubbies: These are perfect for everyday shoes, keeping them off the floor and easy to find.
- Hinged Lift-Top: This gives you hidden storage for seasonal gear like gloves or reusable shopping bags.
- Built-in Drawers: An ideal spot for organizing smaller items like keys and mail, keeping surfaces clear.
This focus on functional furniture is a growing trend. According to market analysis, the global entryway furniture market was valued at about USD 4.81 billion in 2024 and is expected to grow. This shows a real demand for pieces that help us stay organized.
A custom bench is a smart design choice that improves your home’s daily flow. By tailoring it to your family’s habits, you create a functional centerpiece that feels like it was always meant to be there.
For more inspiration, check out these four design recommendations from an interior designer. You can also explore other stylish bench and shoe storage solutions to see how great design can transform a space.
Planning Your Bench Design and Sourcing Materials
A successful project starts with good planning. For builders, homeowners, and remodelers across the Bay Area, this initial stage is critical. It ensures the final piece fits your space and solves your clutter problems.
Start with a tape measure and a simple sketch. Measure the height, width, and depth of your entryway space. Remember to account for door swings, light switches, or heating vents.
Once you have dimensions, sketch your design. Think about your biggest storage needs. Do you need open cubbies for shoes? A lift-top seat for winter gear? Or a tall back with hooks for coats?
Caption: A detailed sketch is the first step to a successful DIY entryway storage bench, helping you visualize the final product and plan your material cuts.
Selecting the Right Lumber for Your Bench
Your choice of wood is the most important decision. It affects the bench's final look and its durability. At Truitt & White, we stock a wide selection of high-quality lumber perfect for any style, from a classic Berkeley bungalow to a modern Oakland loft.
Consider how much use the bench will get.
- Oak: This is my top choice for high-traffic areas. It's very tough and resists dents, making it ideal for a bench used by kids and pets.
- Poplar: If you plan to paint your bench, poplar is a great, budget-friendly option. Its smooth grain provides a perfect surface for a custom-colored finish.
- Maple: Known for its strength and clean look, maple is timeless. It can be stained beautifully or finished with a clear coat to show off the natural grain.
For builders focused on sustainability, it's worth exploring green options. Learn more about our commitment as an eco-friendly lumber supplier in the East Bay and find materials that align with your goals.
A well-planned material list is your roadmap. Finalize your wood choice, hardware needs, and finish type before heading to the lumberyard. This step prevents extra trips and keeps your project on budget.
Lumber Selection Guide for Your DIY Bench
Choosing the right lumber is about matching the wood's features to your project's needs. Here is a quick guide to common choices we see Bay Area builders use for furniture projects.
| Wood Type | Key Benefit | Best For | Considerations |
|---|---|---|---|
| Oak (Red or White) | Incredibly durable | High-traffic benches, families with kids, classic or craftsman styles. | Can be heavy and harder to work with than softer woods. |
| Poplar | Excellent for paint | Any painted project; cost-effective custom furniture. | It's a softer hardwood, so it can dent more easily than oak. |
| Maple | Strong & Smooth | Modern or minimalist designs; benches that will be stained or clear-coated. | Can blotch when stained if not pre-conditioned. |
| Redwood | Naturally rot-resistant | Benches in damp entryways or covered porches in the Bay Area. | It's a softwood, so it's less resistant to dents and dings. |
Choosing Functional Hardware for Your Storage Bench
Hardware brings your design to life. It’s about daily function and long-term use, not just looks. The right hinges, slides, and hooks make your storage helpful, not a hassle.
Consider these key pieces for a functional bench:
- Soft-Close Hinges: A must for any lift-top bench seat. They prevent slamming, which is safer for fingers and quieter.
- Full-Extension Drawer Slides: If you build drawers, these are worth the small extra cost. They let you access the entire drawer, so nothing gets lost in the back.
- Sturdy Coat Hooks: Choose heavy-duty hooks that can handle the weight of winter coats and backpacks without bending.
Investing in quality hardware pays for itself. It guarantees your custom piece works flawlessly for years, adding real value to your home.
Assembling the Bench Frame and Storage Core
With your plans and materials ready, it's time to start building. This is where a pile of lumber becomes the sturdy foundation for your entryway bench. Taking your time here ensures the final piece is strong and square.
First, make your cuts. Use your sketch to measure the pieces for the side panels, base, and any internal dividers. The old rule, "measure twice, cut once," is your best friend here. It saves time, money, and frustration.
Caption: Laying out the cut lumber and hardware shows how planning translates into the physical components of your entryway bench.
Choosing Your Joinery Method
How you connect the pieces determines the bench's strength. For many DIYers and professional remodelers in Berkeley and Oakland, pocket hole joinery is a great option. It creates strong, hidden joints with just a drill and a special jig.
If you have more woodworking experience, you can try traditional options:
- Dowel Joints: These use small wooden pegs (dowels) and glue to form a clean, strong connection with no visible screws.
- Mortise and Tenon Joints: This classic technique provides exceptional strength, ideal for furniture that gets daily use.
Your choice depends on your tools, comfort level, and desired look. The fundamentals of building a solid bench are similar to learning how to properly frame a wall.
Constructing the Core Box
Start by assembling the two side panels and the base piece to form a three-sided box. Use a carpenter's square to check that every corner is a perfect 90 degrees. If the frame isn't square now, it will cause problems later.
Next, install the internal dividers for your storage cubbies. Measure and mark their positions carefully. Secure them firmly, checking for square as you go.
Pro Tip: Always drill pilot holes before driving screws. This simple step prevents the wood from splitting, especially near the edge of a panel, and creates a stronger joint.
Building your own bench is an affordable project. A typical DIY entryway storage bench can cost between $40 to $80 per square foot using common materials like MDF or quality plywood.
Adding Storage Features and the Bench Top
With a solid frame built, it's time to add the features that make your bench functional. This is where you integrate smart storage solutions and attach the bench top. This stage is where the value of a DIY entryway storage bench truly shows.
Especially in Bay Area homes where space is limited, maximizing storage is key. You get to decide on the exact features that solve your family's clutter problems.
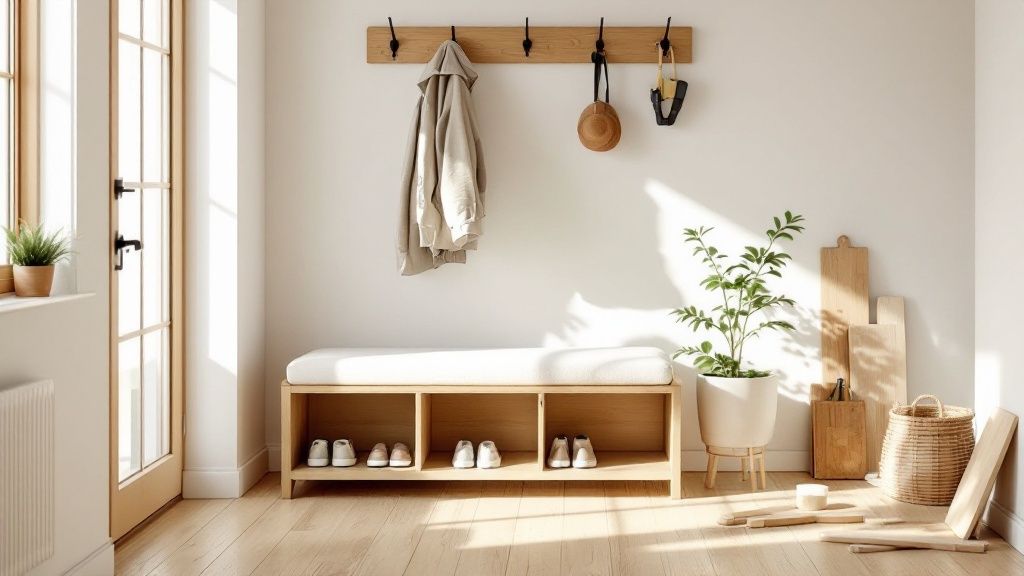
Caption: A finished DIY entryway bench with open cubbies provides an organized and accessible spot for shoes, reducing clutter.
Installing Functional Storage Solutions
The type of storage you build will define how you use the bench every day. There's a solution for whatever you need, whether it's a quick drop-zone for shoes or a place to hide seasonal gear.
Here are a few popular and practical options:
- Open Cubbies: These are simple to build using the dividers you already installed. They are perfect for everyday shoes, keeping them off the floor and easy to grab.
- A Hinged Lift-Top Seat: This is a great choice for hiding items you don't need daily, like winter gloves or scarves. Installing soft-close hinges prevents the top from slamming shut.
- Custom Drawers: For the best concealed organization, drawers are unbeatable. They are ideal for keeping smaller items like keys and mail tidy and your bench top clear.
Choosing the right storage is about being honest about your household's habits. If your family kicks off shoes the moment they walk in, open cubbies will be your best friend.
Crafting and Attaching the Bench Top
The bench top is the last major component. It needs to be both strong and level. The material you choose will have a big impact on the final look.
For a classic, durable surface, a solid piece of oak or maple from a trusted Berkeley building materials supplier like Truitt & White is a great investment. If you plan to add an upholstered cushion, a sturdy piece of ¾-inch cabinet-grade plywood is an excellent, cost-effective base.
Follow these steps to attach the top for a secure, professional fit:
- Measure and Cut: Carefully measure the top of your bench frame. Cut the top piece, allowing for a one-inch overhang on the front and sides for a finished look.
- Smooth the Edges: Thoroughly sand all edges of the bench top. This ensures a smooth, splinter-free finish.
- Secure from Below: Attach the top from underneath the frame. Drive screws up through the top supports and into the underside of the bench top for a clean, seamless surface with no visible fasteners.
Once the top is screwed down, your bench is structurally complete. You have turned a pile of lumber into a custom storage solution.
Applying a Durable and Stylish Finish
The finish protects your new bench and ties it into your home's decor. A quality finish is not just about color; it's about creating a piece that can handle daily use. For a busy Bay Area household, this step is essential.
First, sand the entire bench. A flawless finish starts with a perfectly smooth surface. Start with a medium 120-grit sandpaper, then move to a finer 220-grit to get everything silky-smooth. This is the secret to a professional-looking paint or stain job.
Choosing Between Paint and Stain
Should you paint or stain? It depends on the wood you chose and your desired style. If you used a beautiful hardwood like oak, a stain will highlight the natural grain.
Paint offers unlimited color options and a clean, uniform look. It’s perfect for woods like poplar.
- Water-Based Finishes: These are popular in the Bay Area because they have low odor and dry quickly. Cleanup is also easy with just soap and water.
- Oil-Based Finishes: For maximum durability, oil-based is the way to go. These finishes create a tough, hard-wearing surface ideal for high-traffic furniture.
Pro Tip: Always apply thin, even coats. Whether using a brush or a roller, multiple thin coats will give you a stronger, more beautiful result than one thick coat.
Applying a Protective Topcoat
A protective topcoat is non-negotiable for a piece of furniture that will see daily action. It guards against scratches, moisture, and scuffs. Polyurethane is a great choice, creating a tough barrier that seals your hard work.
If you painted your bench, a water-based polycrylic dries clear and won't yellow over time. For stained wood, either oil-based or water-based polyurethane provides excellent protection. Plan on applying at least two to three coats, sanding lightly between each one for a durable, smooth feel.
For personalized advice on the best products, visit Truitt & White’s Berkeley paint department or check out our Paint and Stain Spotlight online.
Frequently Asked Questions About DIY Entryway Benches
Building your own furniture can bring up questions. Here are answers to some of the most common ones we hear from builders, contractors, and homeowners.
Caption: Our knowledgeable staff can answer your questions and help you find the right materials for your DIY entryway storage bench at our Berkeley lumberyard.
What is the best type of wood for a sturdy entryway bench?
For a durable bench that stands up to daily use, hardwoods like oak or maple are excellent choices. They are incredibly strong and resist wear and tear. If you plan to paint the bench, poplar or cabinet-grade plywood are great, budget-friendly options that provide a smooth surface for finishing.
How can I customize the bench for a small or awkward entryway?
The biggest benefit of a DIY project is customization. Measure your space carefully, then adjust the bench's dimensions to fit perfectly. For a tricky corner in a San Francisco condo, an L-shaped bench works well. For a narrow Berkeley hallway, a taller, slimmer unit can maximize vertical storage without taking up floor space.
Do I need advanced woodworking tools to build this bench?
Not at all. You can build a high-quality bench with a few essential tools. A circular saw, a drill, a pocket hole jig, and a sander will be enough for most designs. While tools like a miter saw can make cuts more precise, you can achieve professional results with a simpler setup and careful work.
What is the best way to protect the bench from wet shoes and coats?
In the Bay Area, protecting your bench from moisture is key. Apply multiple coats of a quality polyurethane or polycrylic topcoat. This creates a water-resistant barrier that makes spills easy to clean. If painting, use a durable enamel paint designed for furniture, as it holds up better to scuffs.
How much should I budget for a DIY entryway bench?
The cost depends on the bench's size and your material choices. A basic bench made from quality plywood or poplar might cost $150-$300 in materials. If you use a premium hardwood like oak for a larger bench, the budget could be closer to $400-$700. Planning your material list carefully helps keep costs in check.
Have more questions about your project? The experts at Truitt & White are here to help. Visit our Berkeley showroom for expert advice or find more answers on our comprehensive FAQ page.


