Direct Answer: Deck framing lasts longest when joist tops are taped, the ledger is flashed and counterflashed, the underside can dry, fasteners match the lumber, and roof runoff is routed away.
We watch it happen at the counter almost every week. Someone spends a month weighing redwood against composite against modified wood, gets the board choice exactly right, then builds it on a substructure that gives out years before the walking surface does.
That mistake is expensive in a way board choice never is. Replacing rotted joists means pulling up every single deck board, including the ones that still look brand new, and hoping the hidden clips and grooves survive the trip.
So this one stays below the surface. Five details in deck framing and joist protection for Bay Area conditions that decide whether you get 12 years or 30, written for the fog, the hillsides, and the permit process we actually deal with here in the East Bay.
1. Tape the Tops of the Joists, the Beams, and the Ledger
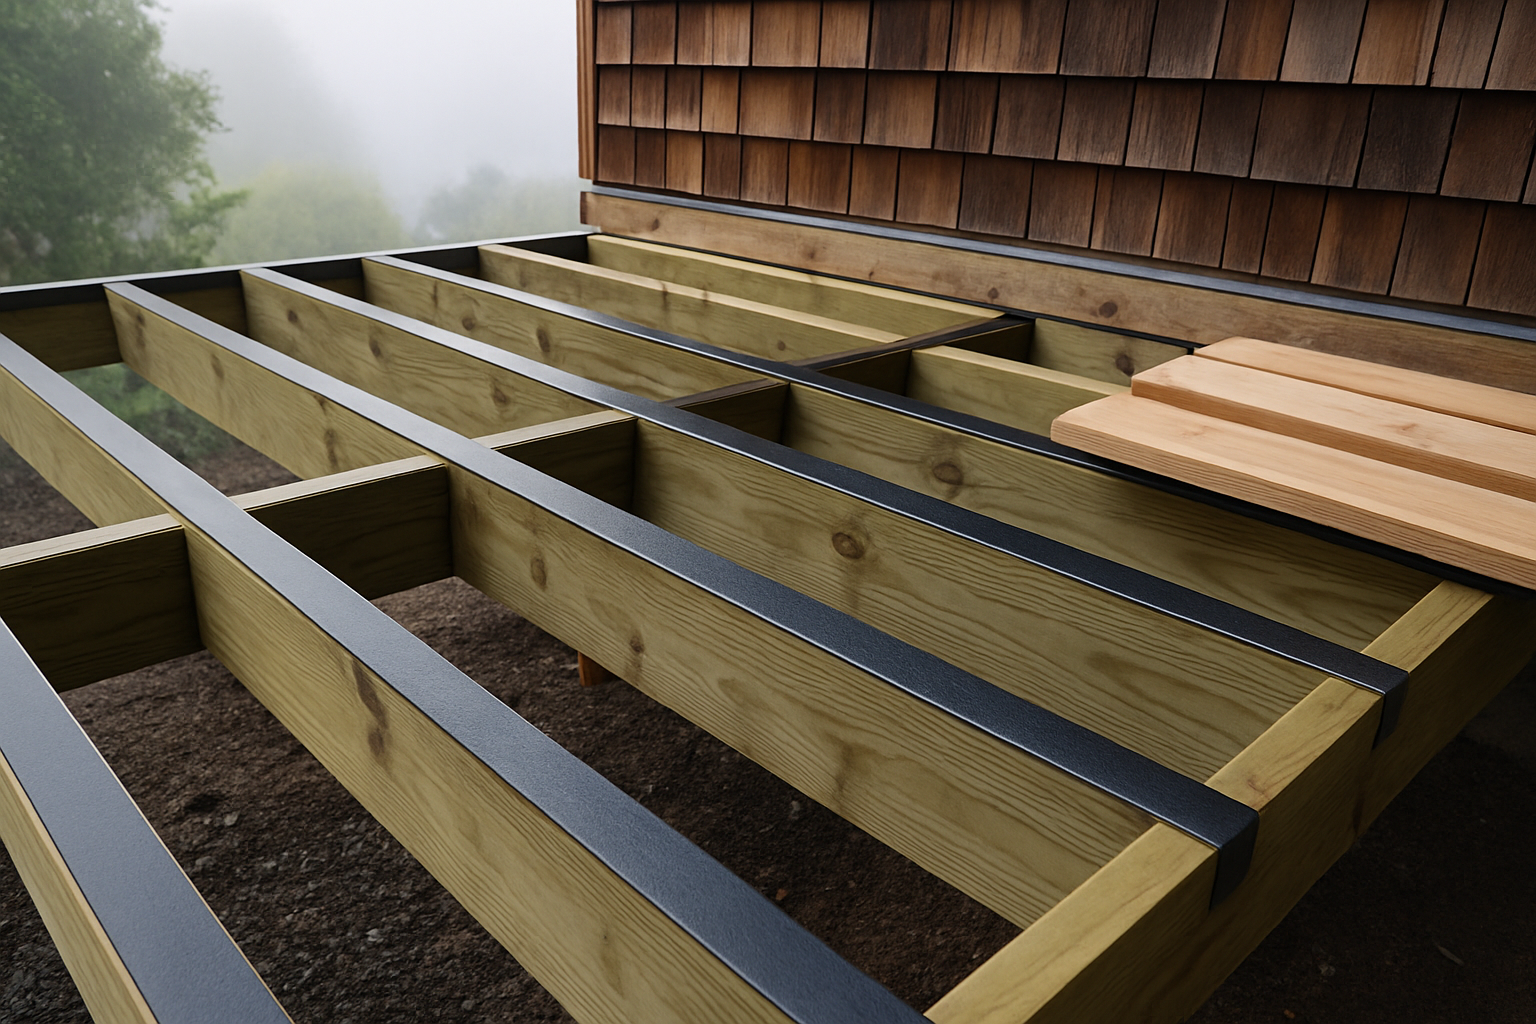
Water gets past deck boards. It always has. The problem is not that it gets through, it is that the top of a joist is a flat wet shelf with a fastener hole punched into it every 16 inches.
A shaded north-facing deck in the Berkeley flats can stay damp for weeks at a stretch during marine layer season. Wood that holds moisture above roughly 20 percent is wood that decay fungi can work on, which is the basic principle behind everything the USDA Forest Products Laboratory has published on wood durability.
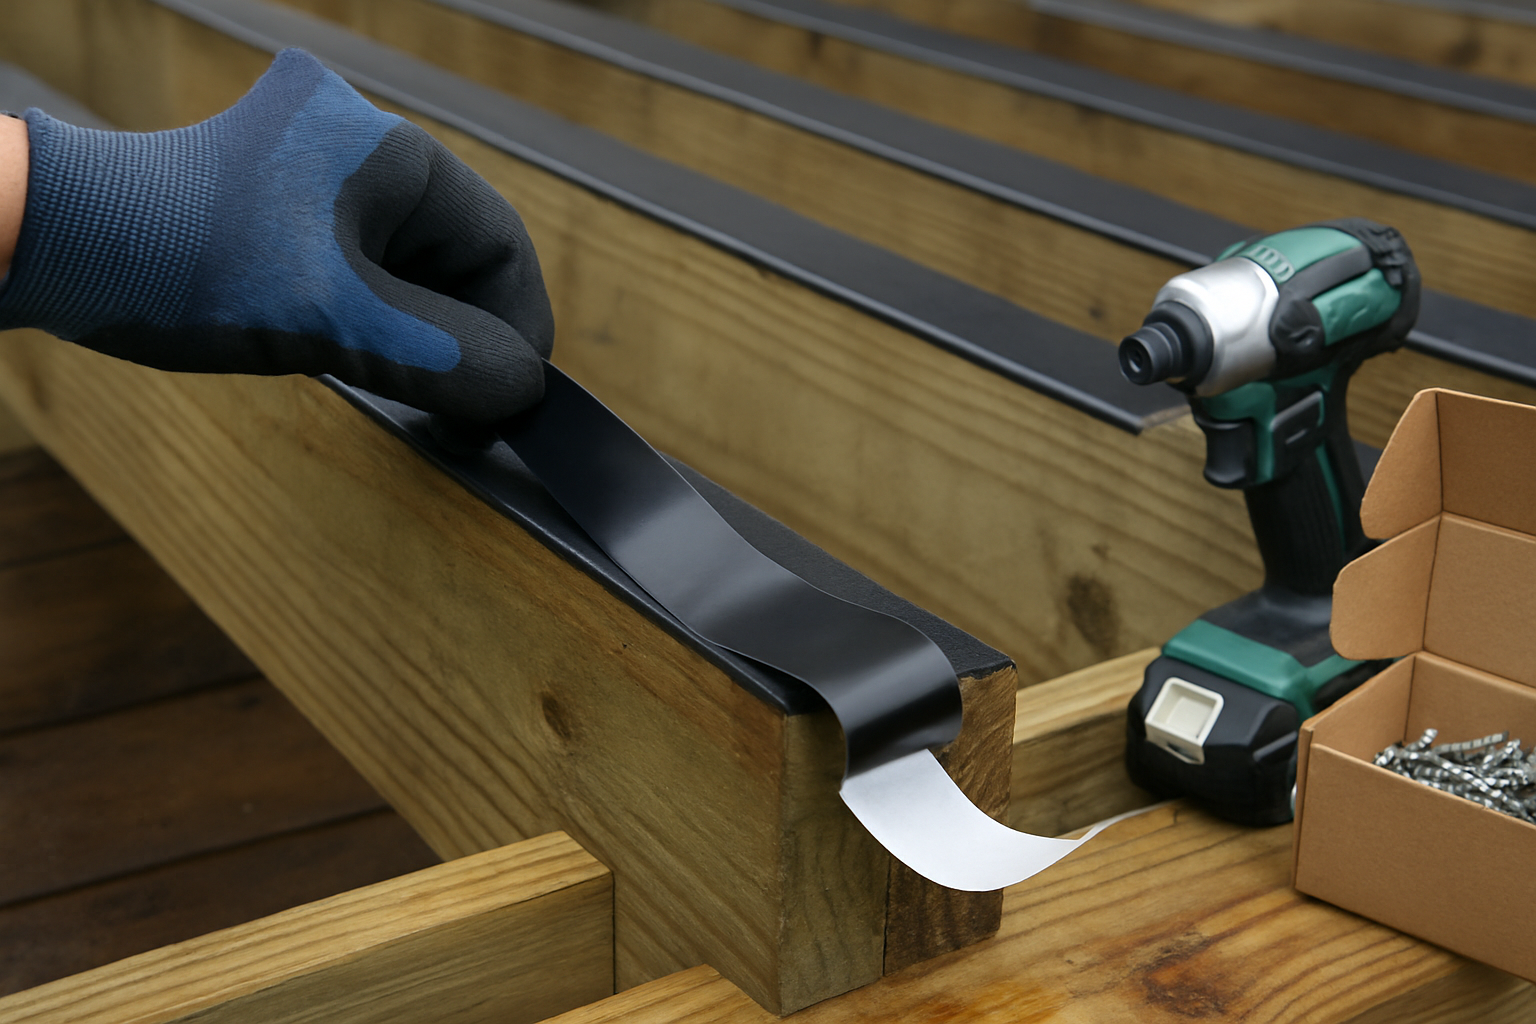
Joist tape is a self-adhered membrane that covers that shelf and seals around each screw shank. Two common types:
- Butyl-backed tape sticks harder, stays flexible in cold weather, and seals around fasteners better
- Acrylic-backed tape costs less, handles UV exposure longer before boards go down, and works fine on drier, sunnier framing
- Wider stock is worth it on beams and doubled rim joists so the tape wraps the edges
Tape the beam tops and the ledger, not just the joists. And if you are running grooved boards with hidden clips, the tape matters even more, because that groove funnels water straight down to the joist top.
2. Flash the Ledger Like It Is Part of the Wall, Not Part of the Deck
Most Bay Area deck rot we hear about starts at the house connection. It is the one spot where an exterior deck punches through a weather barrier that was doing fine on its own.
The sequence is what saves you, and it has to run in this order:
- Cut the siding back and expose sound sheathing and building paper
- Install flashing that laps over the weather barrier below and under it above
- Bolt the ledger through the flashed assembly with the right structural connectors
- Add counterflashing over the top of the ledger so water is pushed back out, not behind the rim joist
Get that order backwards and you have built a funnel that drains into the wall cavity. The damage shows up as soft sheathing and a stained interior wall long after the crew is gone.
This is also a detail an inspector looks at. Berkeley requires permits for most construction and repair work, so the ledger connection is rarely something you get to bury quietly.
We see the same story on the retail side constantly. People come in asking about rotted window sills and trim, and it is nearly always water sitting on a horizontal wood surface with no path out.
3. Give the Underside Air, Clearance, and a Fall Clean-Out
National deck content gets this one wrong for our climate all the time. Advice written for a dry inland market treats the space under a deck as an afterthought. In fog country it is the difference between framing that dries and framing that never does.
Low ground-hugging decks with solid skirting are the worst offenders. You have built a damp, dark, unventilated box and then filled it with wood.
What helps:
- Open skirting or vented panels instead of solid boards, so air actually moves through
- Keep soil, mulch, and planter beds off the framing and away from post bases
- Gravel or a drainage layer under low decks instead of bare dirt that stays saturated
- A fall clean-out of the space below, not just a sweep of the top surface
That last one matters more in the East Bay than people expect. Decks under coast live oaks and redwoods collect a mat of leaf and needle debris that holds water against joists and beams straight through winter. Pulling that out in September or October buys you a whole dry season.
Where Water Actually Sits Under a Bay Area Deck
Five spots account for most substructure failures we hear about across the counter. Here is what goes wrong at each and the detail that slows it down.
| Location | What Goes Wrong | The Detail That Helps |
|---|---|---|
| Top of joist | Water pools on the flat face and wicks into every fastener hole | Self-adhered joist tape, butyl or acrylic |
| Ledger at the house | Runoff gets behind the rim joist and into the wall cavity | Flashing under the weather barrier plus counterflashing on top |
| Beam tops | Doubled or tripled members trap water in the seams | Wide tape lapping over both edges |
| Post bases | Soil, mulch, or standing water keeps end grain wet | Standoff bases, clearance, drainage rock |
| Framing bays under low decks | Leaf debris holds moisture against wood all winter | Open skirting and an annual fall clean-out |
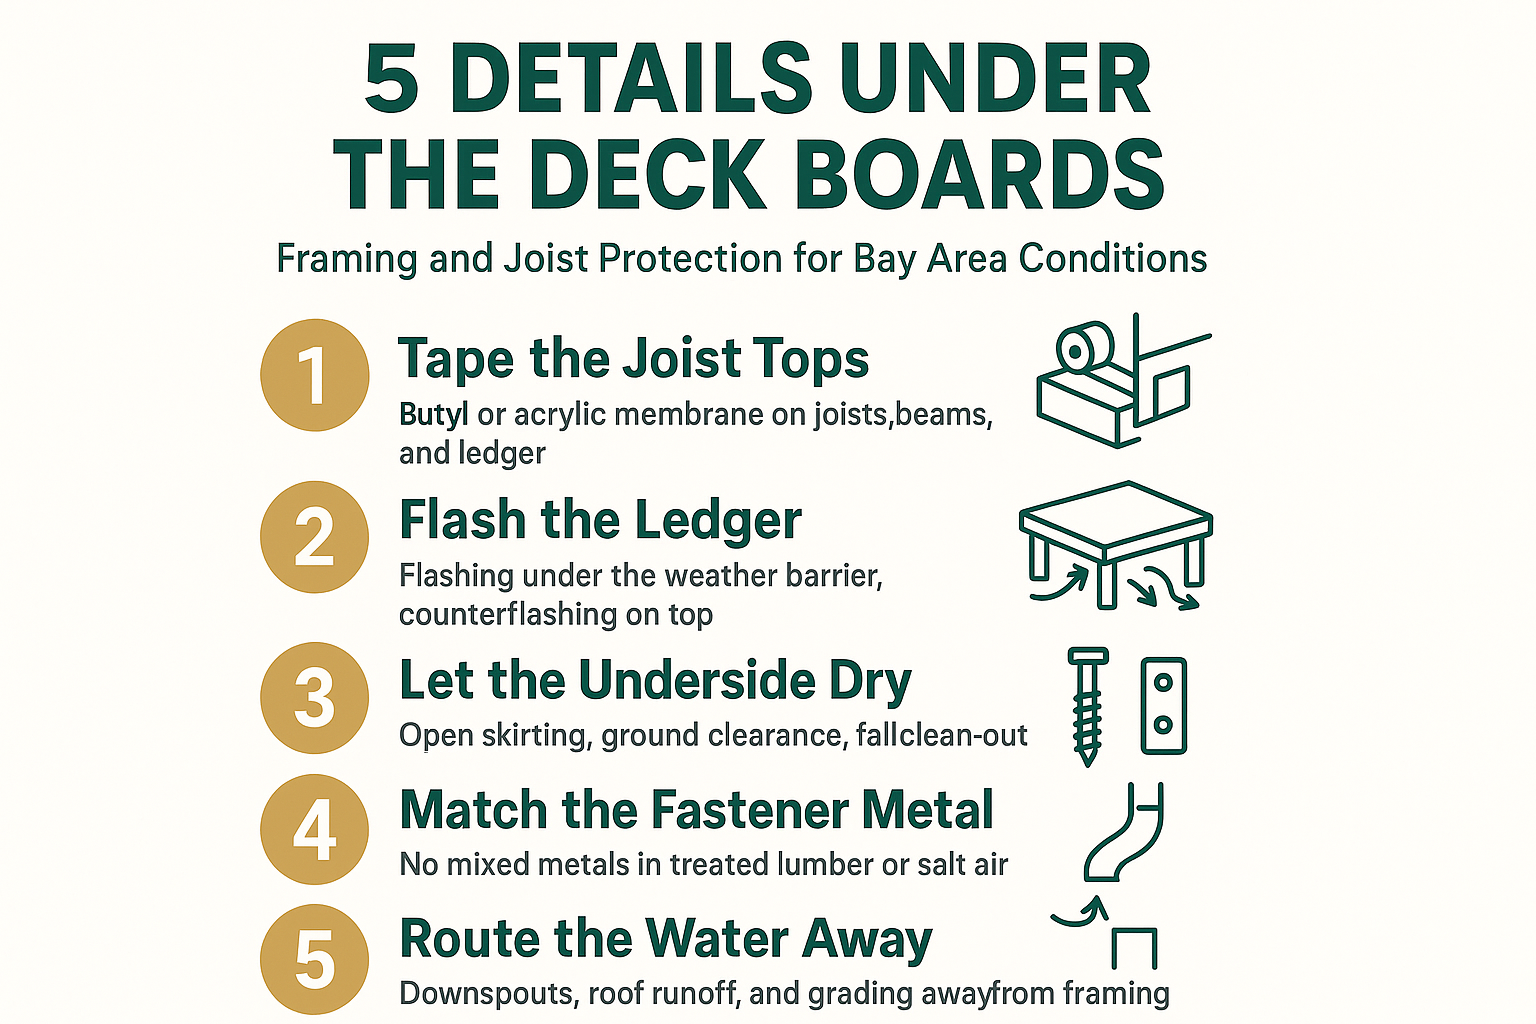
The Five Details at a Glance
A quick reference for the framing stage, in the order these details get built.
4. Match the Fastener Metal to the Lumber and the Air
Salt air moving in off the Bay is hard on plated hardware, and mixing metals at the ledger or inside treated lumber shortens the life of the whole assembly. Modern treated lumber chemistry is corrosive to the wrong metals, and a connector that fails takes the framing with it.
We cover fastener and connector metals in depth in a separate piece rather than repeating the comparison here. For the framing stage, the short version is to keep the metal consistent across bolts, connectors, and washers, and to check what your treated lumber supplier actually calls for.
If you are still deciding on framing lumber itself, what the pressure-treated labels actually mean is worth reading before you spec the hardware.
5. Decide Where the Water Goes Once It Clears the Deck
This is the detail that gets skipped most often, and it shortens a substructure’s life more than board choice ever will. The framing can be perfect and still sit in a puddle nine months a year.
Things we see that quietly destroy good framing:
- A downspout dumping right next to a deck post, saturating the base every storm
- Roof runoff with no gutter sheeting directly across beams and joists
- Grading that slopes toward the house and pushes water under a low deck
- Irrigation and planters set right up against the rim
There is also a real timing issue here. Oakland enforces a wet-weather grading moratorium from October 15 to April 15, so slope and drainage work near a deck belongs on the late summer schedule, not the December one.
Plan the drainage fix in the same conversation as the deck itself. If you are early in the process, our guide to planning and building a deck walks the sequence, and TJI joists versus solid lumber covers the framing member decision that sits underneath all of this.
Frequently Asked Questions About Deck Framing and Joist Protection
Can I add joist tape to a deck that already has boards on it?
Not really, and that is the frustrating part. Taping the joist tops means the boards have to come off, which is why we push people to handle it during framing. If you are already doing a board replacement on an older deck, that is your one clean window to tape everything before the new surface goes down.
Is butyl or acrylic joist tape better for a Berkeley or Oakland deck?
Butyl-backed tape seals harder around fastener shanks and stays flexible in cool damp weather, which suits shaded, fog-exposed decks. Acrylic tape holds up better to UV exposure if the framing is going to sit open for a while before boards go down, and it usually costs less. On a north-facing deck in the flats, we lean butyl.
Does pressure-treated framing mean I can skip the tape?
Treatment resists decay, it does not stop water from sitting on a flat surface and cycling in and out of fastener holes. Treated framing plus taped tops is a much longer-lasting assembly than either one alone.
How much clearance should I leave under a low deck?
More than you think, and more than most national guidance suggests for our climate. The working goal is air movement and a way to clean out debris, so open or vented skirting matters as much as raw inches. Check with your local building department, since hillside and setback conditions in Berkeley and Oakland can change what is workable.
Do I need a permit just to replace rotted joists?
Very likely. Berkeley requires permits for most construction and repair work, and structural framing on a deck is squarely in that category. Call the building department before the demo starts rather than after.
Want to Talk a Framing Detail Through Before You Buy?
Our crew at 642 Hearst Avenue has been watching East Bay substructures come apart and hold together for a long time, and they will pick through stock with you for the good boards or walk a flashing sequence at the counter. The hardware side keeps joist tape, flashing, and fastener options in one trip, so the details above do not turn into three stops. Both Berkeley locations and truittandwhite.com are there when you want a second opinion on a detail, and the Lumberyard and Hardware line is 510-841-0511.